Upgrading My Stereo PART 3: Using Volumio Media Centre As A Head Unit
In this final post I’ll show you how I configured the open-source media centre software Volumio to work as a stand alone player with a touchscreen.
This gets a bit technical but hang in there and I’ll try to explain it as best I can. I’m going to assume some knowledge of the basic functionality of the Raspberry Pi.
Things you’ll need:
- Raspberry Pi with WiFi capabilities
- Computer with a Micro SD card reader and WiFi capabilities
- Minimum 16GB Micro SD Card
- PC keyboard
- An internet connection
Software Requirements
I spent a LOT of time researching the software component of the head unit. It was really important to me that it fulfilled the following criteria otherwise I might as well have gone with a standard head unit and audio system.
I knew that the primary method of storage for my music would be mp3 and therefore would require navigating through various folders and tree-structures. I’ve yet to use a single DIN head unit where this is simple and straightforward and this is where big screen devices excel.
I was looking for an easy to use interface that could either be optimised or worked straight away with a touch screen. Ideally controls like volume, track position and next/previous track would be large and easy to press and the navigation of files from a USB drive would be straightforward. I didn’t need anything too fancy but it would be an added bonus if I could customise the look and feel a bit.
Software Options
I experimented with Kodi (https://kodi.tv/, an open-source media player) and also the Raspbian version of Android Auto (https://bit.ly/2DaMRyN).
Kodi
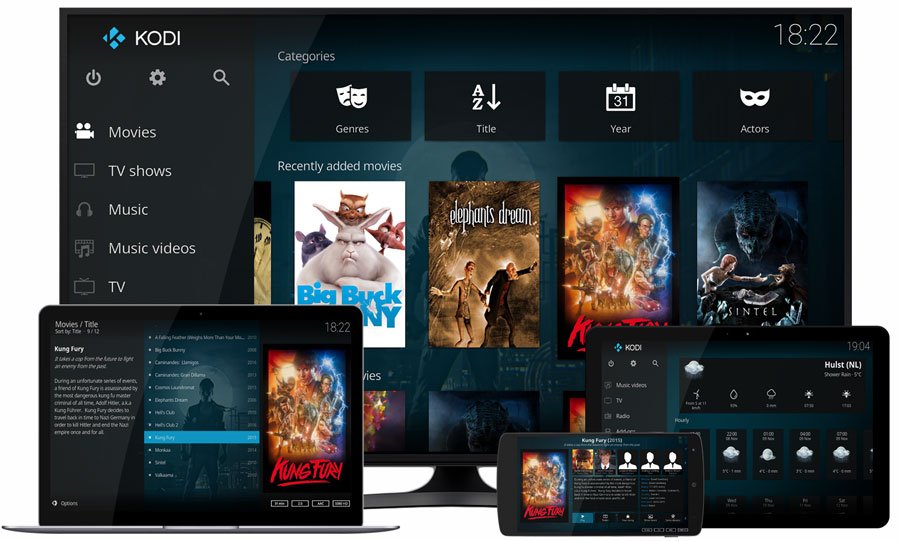
Kodi is a multi-platform open-source media player. It’s optimised to play any kind of music, video or photo file that you can think of and will work on many popular platforms. Most people I know that are using it use it as a media centre and a replacement for a smart TV. For this purpose it works really well and with many different skins, looks fantastic. Given it’s pedigree I wondered if it would be any good as a head-unit.
It was pretty easy to install on the Pi (instructions here: https://bit.ly/2Hs6bfs). I had a play around and tried a few different skins but I found the interface a bit tricky to navigate, even with the touchscreen skin enabled. For my purpose as a head-unit I needed a really simple interface and large controls which made Kodi unsuitable.
Android Auto
Android Auto is a fantastic project from Google and then next logical step to integrating the functionality of your smartphone into your car. The idea is that you connect your phone to your head-unit via USB and then you’ll be able to access some of the main functions from the touchscreen in your car.
The layout is simplified for easy navigation and includes functionality like making calls, playing music tracks stored on your phone and, of course, Google Maps.

I heard about a project to port Android Auto to the Raspberry Pi from a friend so decided to try and configure it on my system. This looked like a fantastic option. A friend of mine has just paid over £400 for an Android Auto enabled head-unit so the possibility of making one for a fraction of that price was very appealing.
After an evening typing long and complex install scrips into the console, I plugged in my phone aaaaaaaand nothing happened. I did some research and either I was using an incompatible cable to connect my phone, I did something wrong in the setup or my phone doesn’t support AA. DOH! I should probably have checked this first.
It took quite a lot of effort to configure everything and the project is still pretty alpha at the moment so instead of spending even more time troubleshooting I decided to look for other options. I kept the SD card to one side so I can experiment with this in the future as some of the functions are really cool!
If your computer savvy and looking for an interesting project I would highly recommend giving this a go, hopefully you’ll have more luck than I did!
Volumio
After more searching I found Volumio (https://volumio.org/).
Volumio is a multi-platform, hugely versatile, audiophile-grade media player. It’s highly configurable and optimised to work with a range of hardware setups. It will play pretty much any format that you throw at it and, although looking very premium, is available free of charge and is completely open-source.
On the website it is written that Volumio is probably best suited to being a headless digital audio player (DAP). That is, connected to a home stereo system and then controlled from a web interface, as shown below.
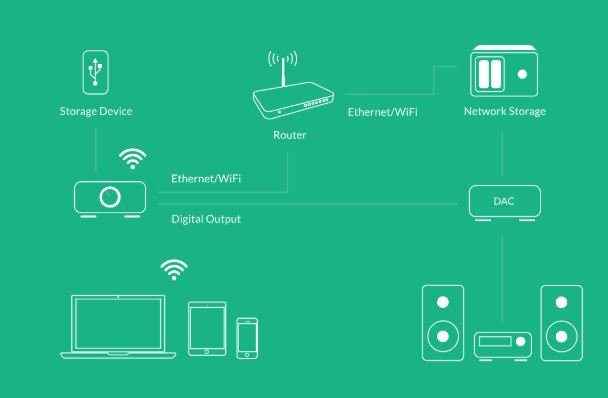
Although it is primarily made to be used as a headless DAP, I knew from reading around a bit on the website and in the very lively forum that I could adapt it to fit my purposes.
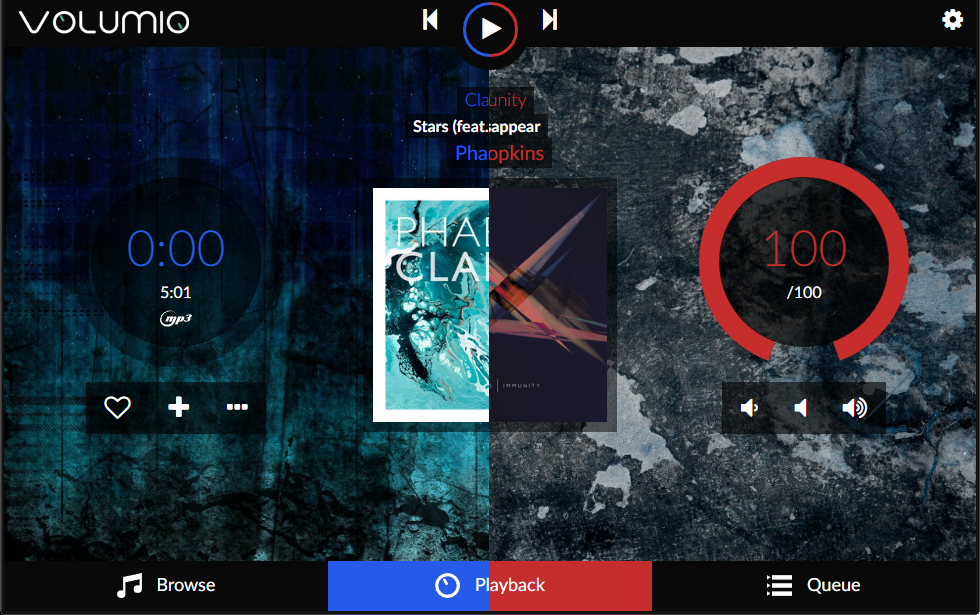
This looked like an excellent candidate for a head-unit. The first thing I noticed was the simple layout of the main play functions and straightforward navigation of play media. No complex menus, everything was in front of you and easily accessible. I decided to give it a test!
Download and Imaging
Firstly, I downloaded the software from the ‘Downloads’ section of the website, in my case for Raspberry Pi.
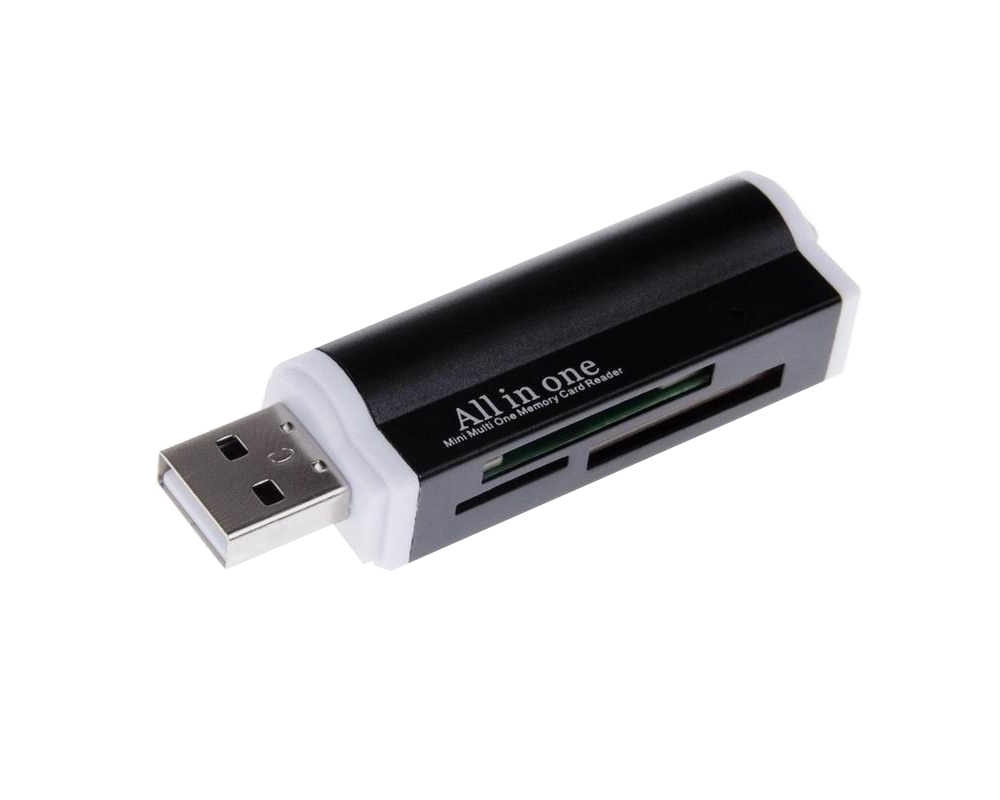
You’ll need a method of reading a Mirco SD card with your PC. Most laptops have a slot somewhere on the side but if yours doesn’t then can buy a USB hub with one in or something like this, which I bought from eBay (https://bit.ly/2QRmm5k).
With the Micro SD card connected to my PC I used Rufus (https://rufus.ie/) to flash the image. Select ‘DD Image’ from the drop-down menu and then click the disk icon and find the Volumio image you just downloaded (will be called something like volumio-2.513-2018-12-07-pi.img).
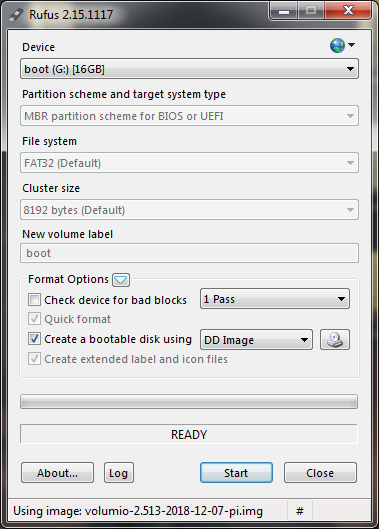
Make sure that the ‘Device’ in top menu is the SD card you’d like to be imaged and click ‘Start’. It will give you a warning about data being erased, click ‘OK’.
When Rufus is done flashing the SD Card, remove it and place it into your Raspberry Pi.
Volumio Boot Up
The first time you boot up Volumio it will take a few minutes to configure itself, this can take up to 6 minutes. It’s important to let it finish and not to turn it off in the middle so even if it looks like a black screen, just leave it!
When it’s finished you’ll get some scrolling white text and then it’ll drop into the following prompt with a flashing cursor.

Volumio First Time Configuration
Now that Volumio is configured you can connect to the Pi from your web browser. At this point the Pi should be broadcasting a WiFi network called ‘volumio’. Connect to this using network the password volumio2.
If you’re not seeing the network then you’ll need to do some additional troubleshooting. You might need to configure the network settings of the Pi. There’s a decent guide here: https://pimylifeup.com/setting-up-raspberry-pi-wifi/
Once you’re connected to the ‘Volumio’ network open your web browser and type – http://volumio.local into the address bar and press enter. You should get the following screen.

For the next few steps you’ll need to have access to an internet connection. WiFi is best but a phone hotspot should work too. You won’t need to be connected to the internet every time you use Volumio but we’ll need it for the initial setup.

Work through the setup wizard and make sure that you put in the correct details for the WiFi network you want to connect to. THIS IS REALLY IMPORTANT!
Volumio will stop broadcasting the hotspot once you finish the setup and will attempt to connect to the network that was entered. If you enter the wrong password then you won’t be able to reconnect to the Pi, even if you type the IP address straight into your browser. I didn’t find any way to force it to broadcast again without re-flashing the SD Card and starting again.
You don’t want to have to do that, it’s really annoying, just make sure the password is correct.
Once you’ve got to the end of the wizard you can donate some money if you’re feeling kind. This is an open-source project and is given out freely so I’m sure the developers would appreciate a few quid for their efforts or just to encourage them to continue developing this awesome platform.
Or you can just click Done.

At this point you should get a screen similar to this. You’ll get a small notification in the top right corner of the screen that the network service has restarted.

If you’re lucky then you should be able to navigate around and play any music files you have on a connected device. Alternatively, you might click on something, get a spinning disk and then end up with this screen.

This isn’t too much of a problem. Hopefully this means that somehow the Pi is connected with a different IP address than the default for Volumio (192.168.211.1). We’ll need to find this IP address in order to connect via web browser.
Finding Volumios IP Address
If you haven’t already, connect the keyboard to the Pi and log in with the following credentials.
volumio login: root
password: volumio
If the login was a success you should get the following screen. Well done, you elite H4xx0r!

At the prompt type ifconfig and press enter. You should get a screen like this:

In the section that reads ‘wlan0’ look for something that looks like this
inet addr:192.168.5.185This is the IP address that Volumio is connected with on your network. Type this number (not the words) into your web browser and press enter.
You should now have the Volumio interface in front of you in your web browser. I’d definitely advise you to have a play around and explore some of the functions.
If you’re still struggling to get things working or want to read more, check out the documentation on the Volumio website, https://bit.ly/2TRe7bi.
Configuring the Touchscreen
Thankfully, some kind genius has released a plugin that makes it really easy to configure Volumio to work with a touch screen.
Click on the cog in the top right of the screen and navigate to the PLUGINS menu. Under Miscellanea you should find Touch Display Plugin.

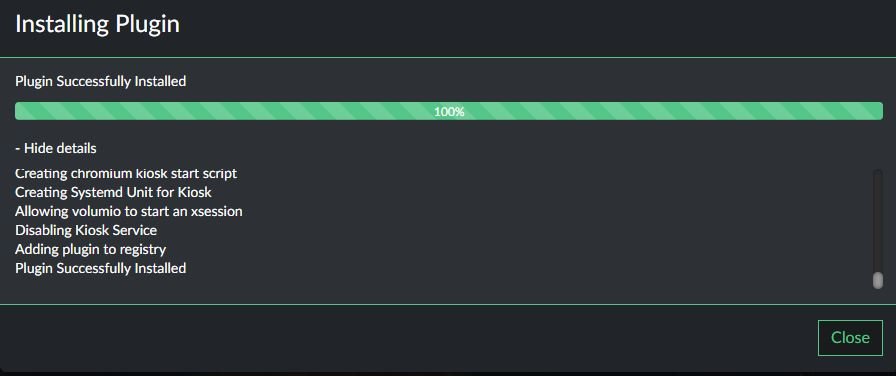
Before you install it make sure you remove the keyboard from the Pi otherwise it will hang and not complete, this took me aaaages to figure out! After a few minutes you should get a nice confirmation of the successful installation of the plugin.
Click on Installed Plugins and then move the slider to ON. The notification in the centre should change to green and say Active.

The screen on your Pi should flicker quickly and after a minute you’ll see the Volumio display on your touchscreen as in the web browser.

Congratulations! You should now be able to navigate around locally without the need to for a computer or web browser. At this point you’re ready to go if you want to install the touchscreen in your vehicle.
Further Configuration
In addition to the Touch Display there are some other really neat plugins. If you have a Premium Spotify account then you can install a plugin to link it and access it from Volumio. There’s various radio plugins and more in-depth features like a GPIO button listener or IR Remote control. Have a search, I was really impressed with the additional functionality offered here!
At this point I would advise checking for a software update. To do this Click the cog in the corner and navigate to the SETTINGS menu. Under System Updates click Check Updates and install any that are here.
Complete Cost of Project
| Component | Cost | Bought From |
| Raspberry Pi 3 B+ | £35 | The Pi Hut |
| Official 7″ Touchscreen | £63 | Amazon |
| LEPY – LP-2020A Class D Amplifier | £14 | Ebay |
| FLI – Audio Integrator 6″ Speakers | £30 | Amazon |
| Aluminium Corner Angle | £10 | Homebase |
| Hinges and Screws and Switches | £5 | Various |
| Audio cables | £7 | Ebay |
| Total | £164 |
I don’t think I could have got anything near this kind of spec if I’d have bought a standard ‘off the shelf’ head unit. A quick search showed that double DIN touchscreen units range from £130 up to as much as £600!
I’m really pleased with how this has turned out and was definitely worth the extra effort building it myself.
I’ve now got a tiny but powerful and hugely customisable computer on my dashboard. With a simple switch of the Micro SD Card I can change the operating system and use it for other purposes. I could probably use it to track my solar power usage and statistics or build an interface to control various aspects of the van. There’s also an open-source OBD-II reader for Raspberry Pi (More here: https://bit.ly/2CoJt1Q) which would be really useful to have for diagnostics if I ever break down.
In my next post I’ll show you how to customise the look of Volumio and change the highlight colours to any colour you like!