
In this post I’ll show you how I built my music studio computer and modified it and the screens to run from a 12 Volt DC power supply.
I knew I would be running from battery power and I would be using the studio for long stretches at a time so it was important that everything was as efficient and low-powered as possible. Even 10 or 20 Watts extra, which is nothing in a house, could knock hours off the time I was able to use the studio.
With this in mind, I decided I should try and run as many things as possible natively from the 12 Volt supply rather than using the inverter which will lose about 12% of power in the conversion to 240 Volt mains power.
I wanted to build a proper, desktop PC as they can be built fairly cheaply and are easier to upgrade and maintain than a laptop. They generally last a bit longer too which is a nice bonus.
I’d never seen a desktop computer that ran from a 12 Volt supply but I thought it must exist. Inside a computer the components run from a mixture of voltages, from 3.3 up to 12 Volts so it seemed natural that a lower voltage power supply must exist.
After some searching I found this:

The description on the website (mini-box.com) reads; ‘M2-ATX is an intelligent, high power, vehicle (car / boat / electric cart) 12V DC-DC ATX PC power supply designed for car PC and battery powered applications.‘
This was perfect! A 12 Volt ATX power supply that was capable enough to run a reasonable studio PC. 160W of power isn’t a huge amount for a modern computer but if I was thoughtful about the components I used then it should be fine.
Components

With the power supply sorted, I started choosing the components for the computer, I prioritised physical space and power efficiency. It would be a ‘barebones’ system with just the necessary components I’d need to run the music and video editing software I use but with capacity to upgrade and expand if I needed to in the future. I wouldn’t be gaming so I definitely wouldn’t need gigantic fans, stacks of hard drives and large graphics cards.
Before I bought anything, I used a computer power calculator to check that I could run everything I wanted from 160W. There’s a good one here: http://www.coolermaster.com/power-supply-calculator/
In the end I decided against including a dedicated PCI-e graphics card as it required a minimum of 300W to function correctly and wasn’t really necessary for the kind work I was doing. Modern processors feature on-board graphics chips which are more than capable of dealing with basic day-to-day functions at a fraction of the power demand.
Computer Case
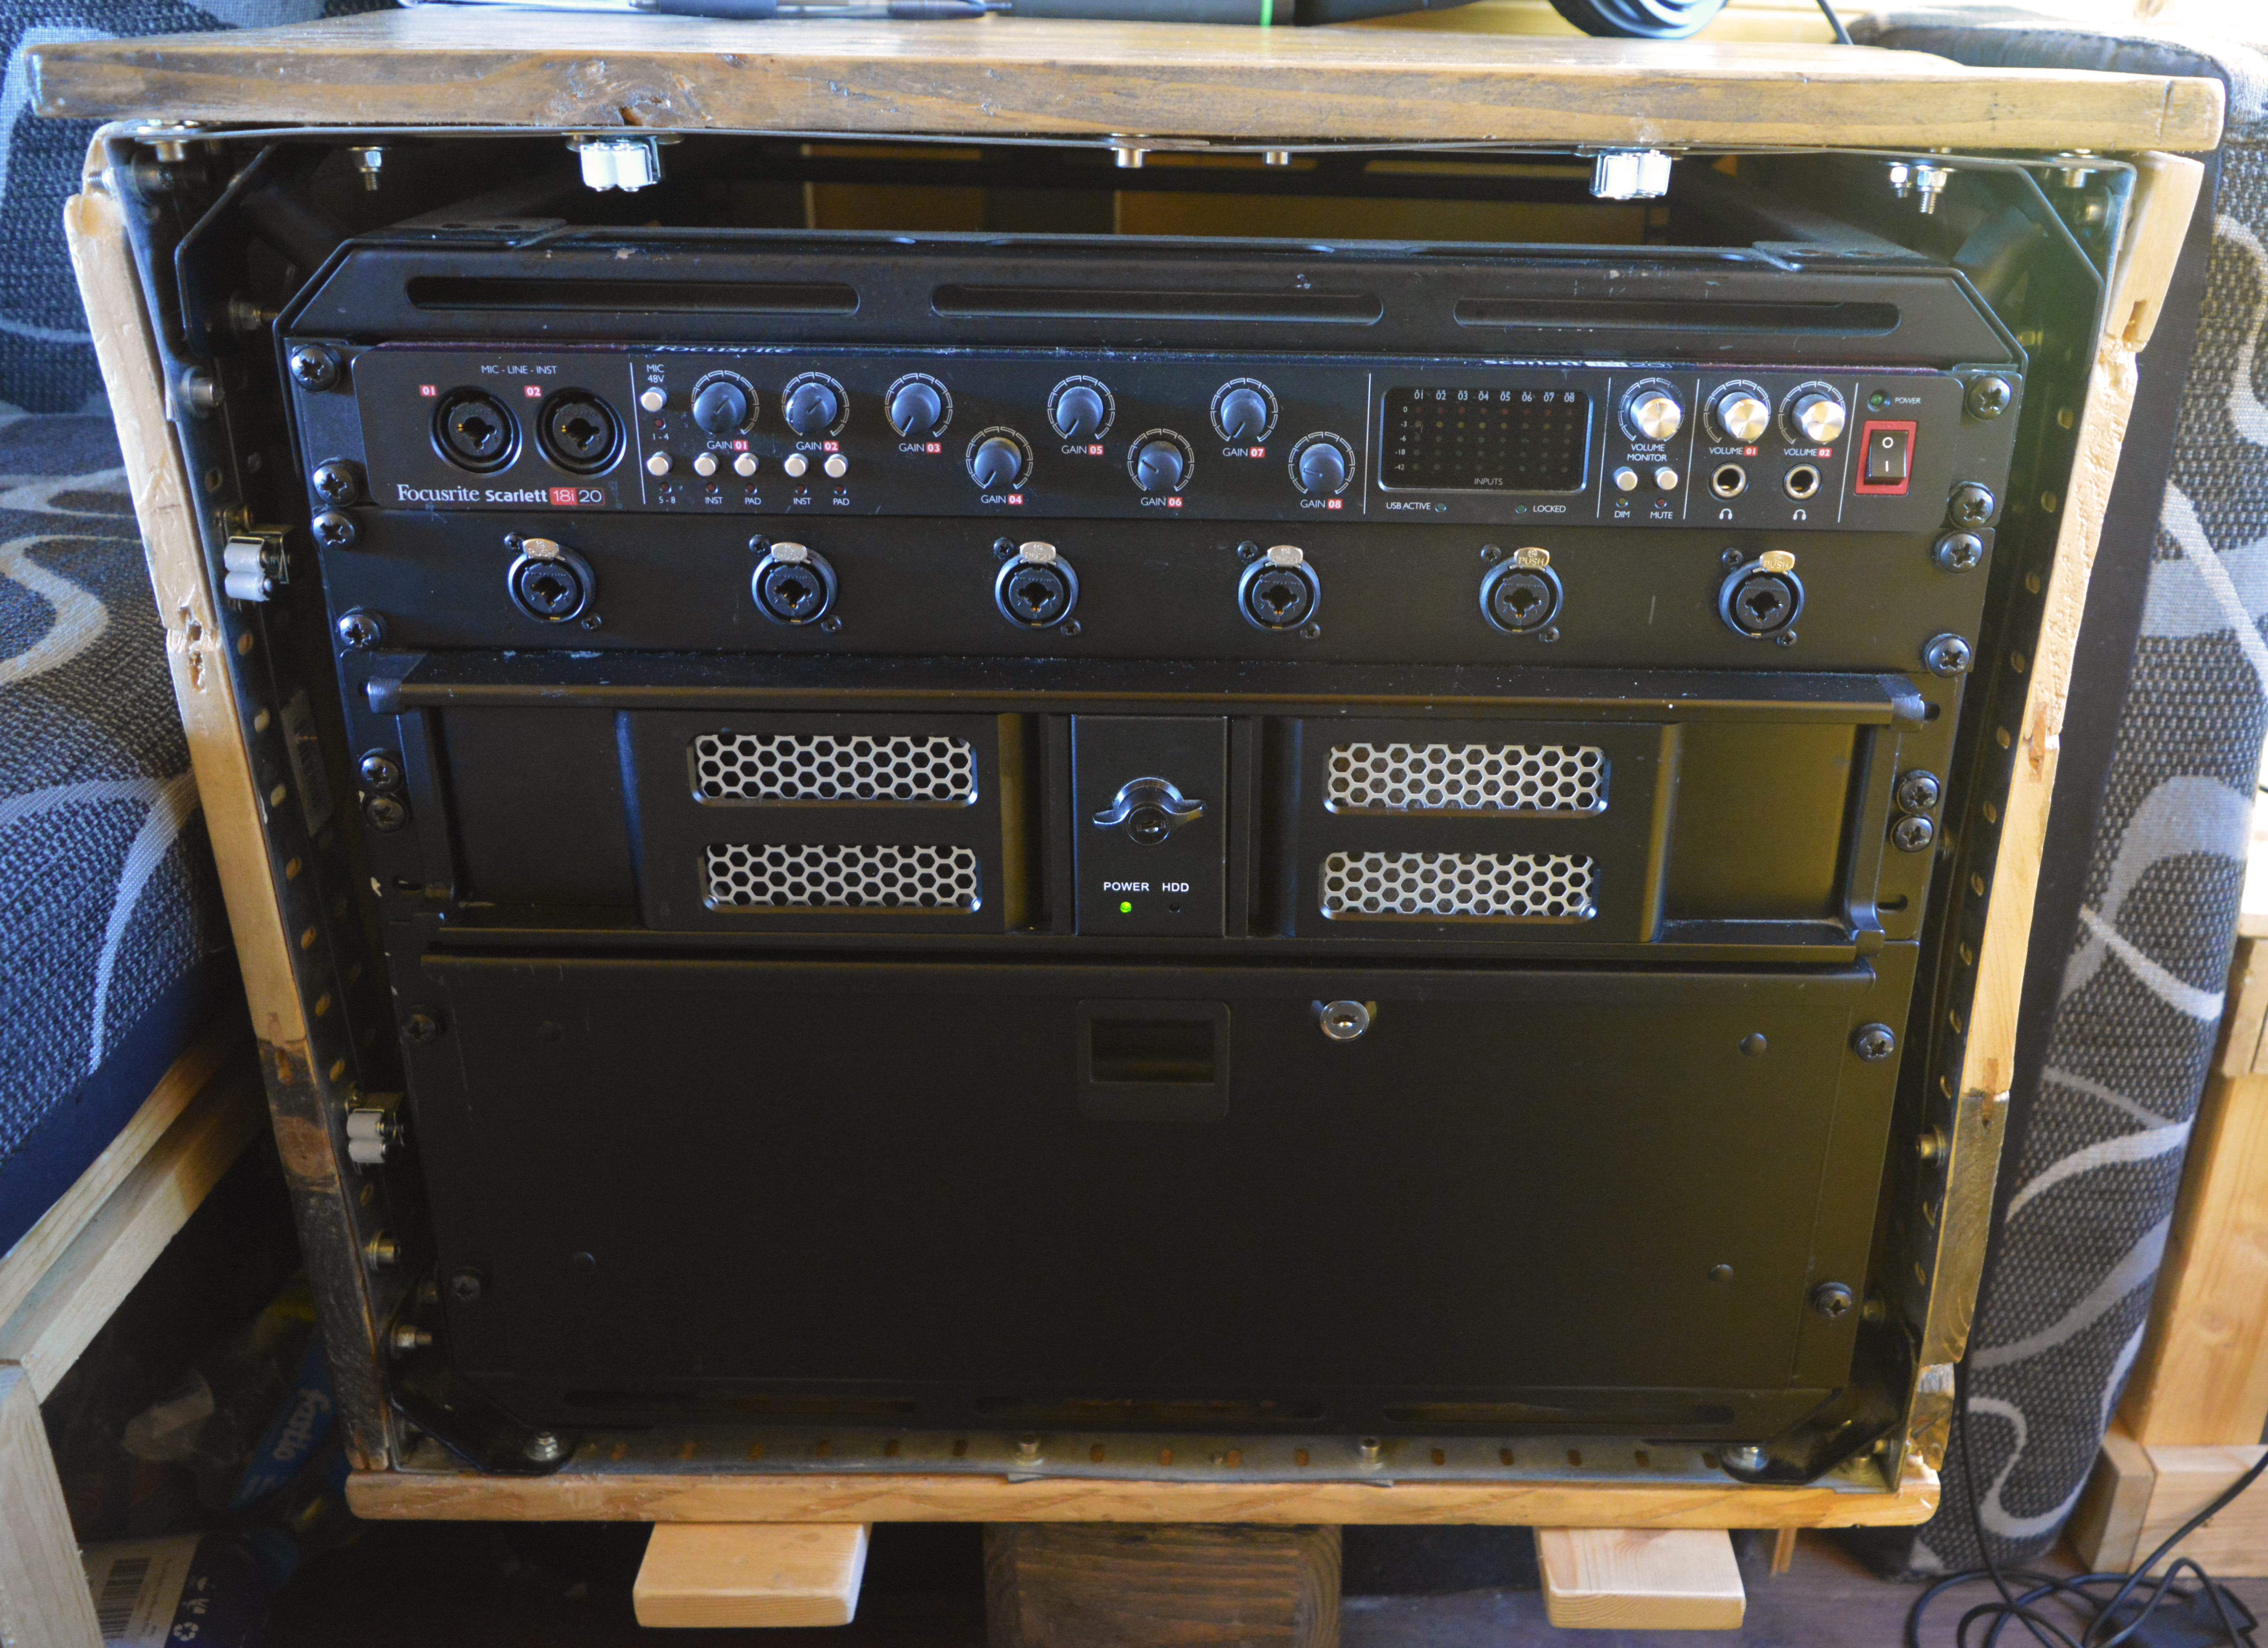
I had already decided to use a 19″ rack mount system for my studio equipment so I found a 19″ rackmount case for the computer. This way it would take advantage of the shock resistant system and be neatly stacked with the rest of the studio gear which would make connecting everything together a bit easier.
I bought this case here : https://www.xcase.co.uk/collections/2u-rackmount-cases/products/x-case-studio-2-2u-m-atx-short-double-door-aluminium-front-panel
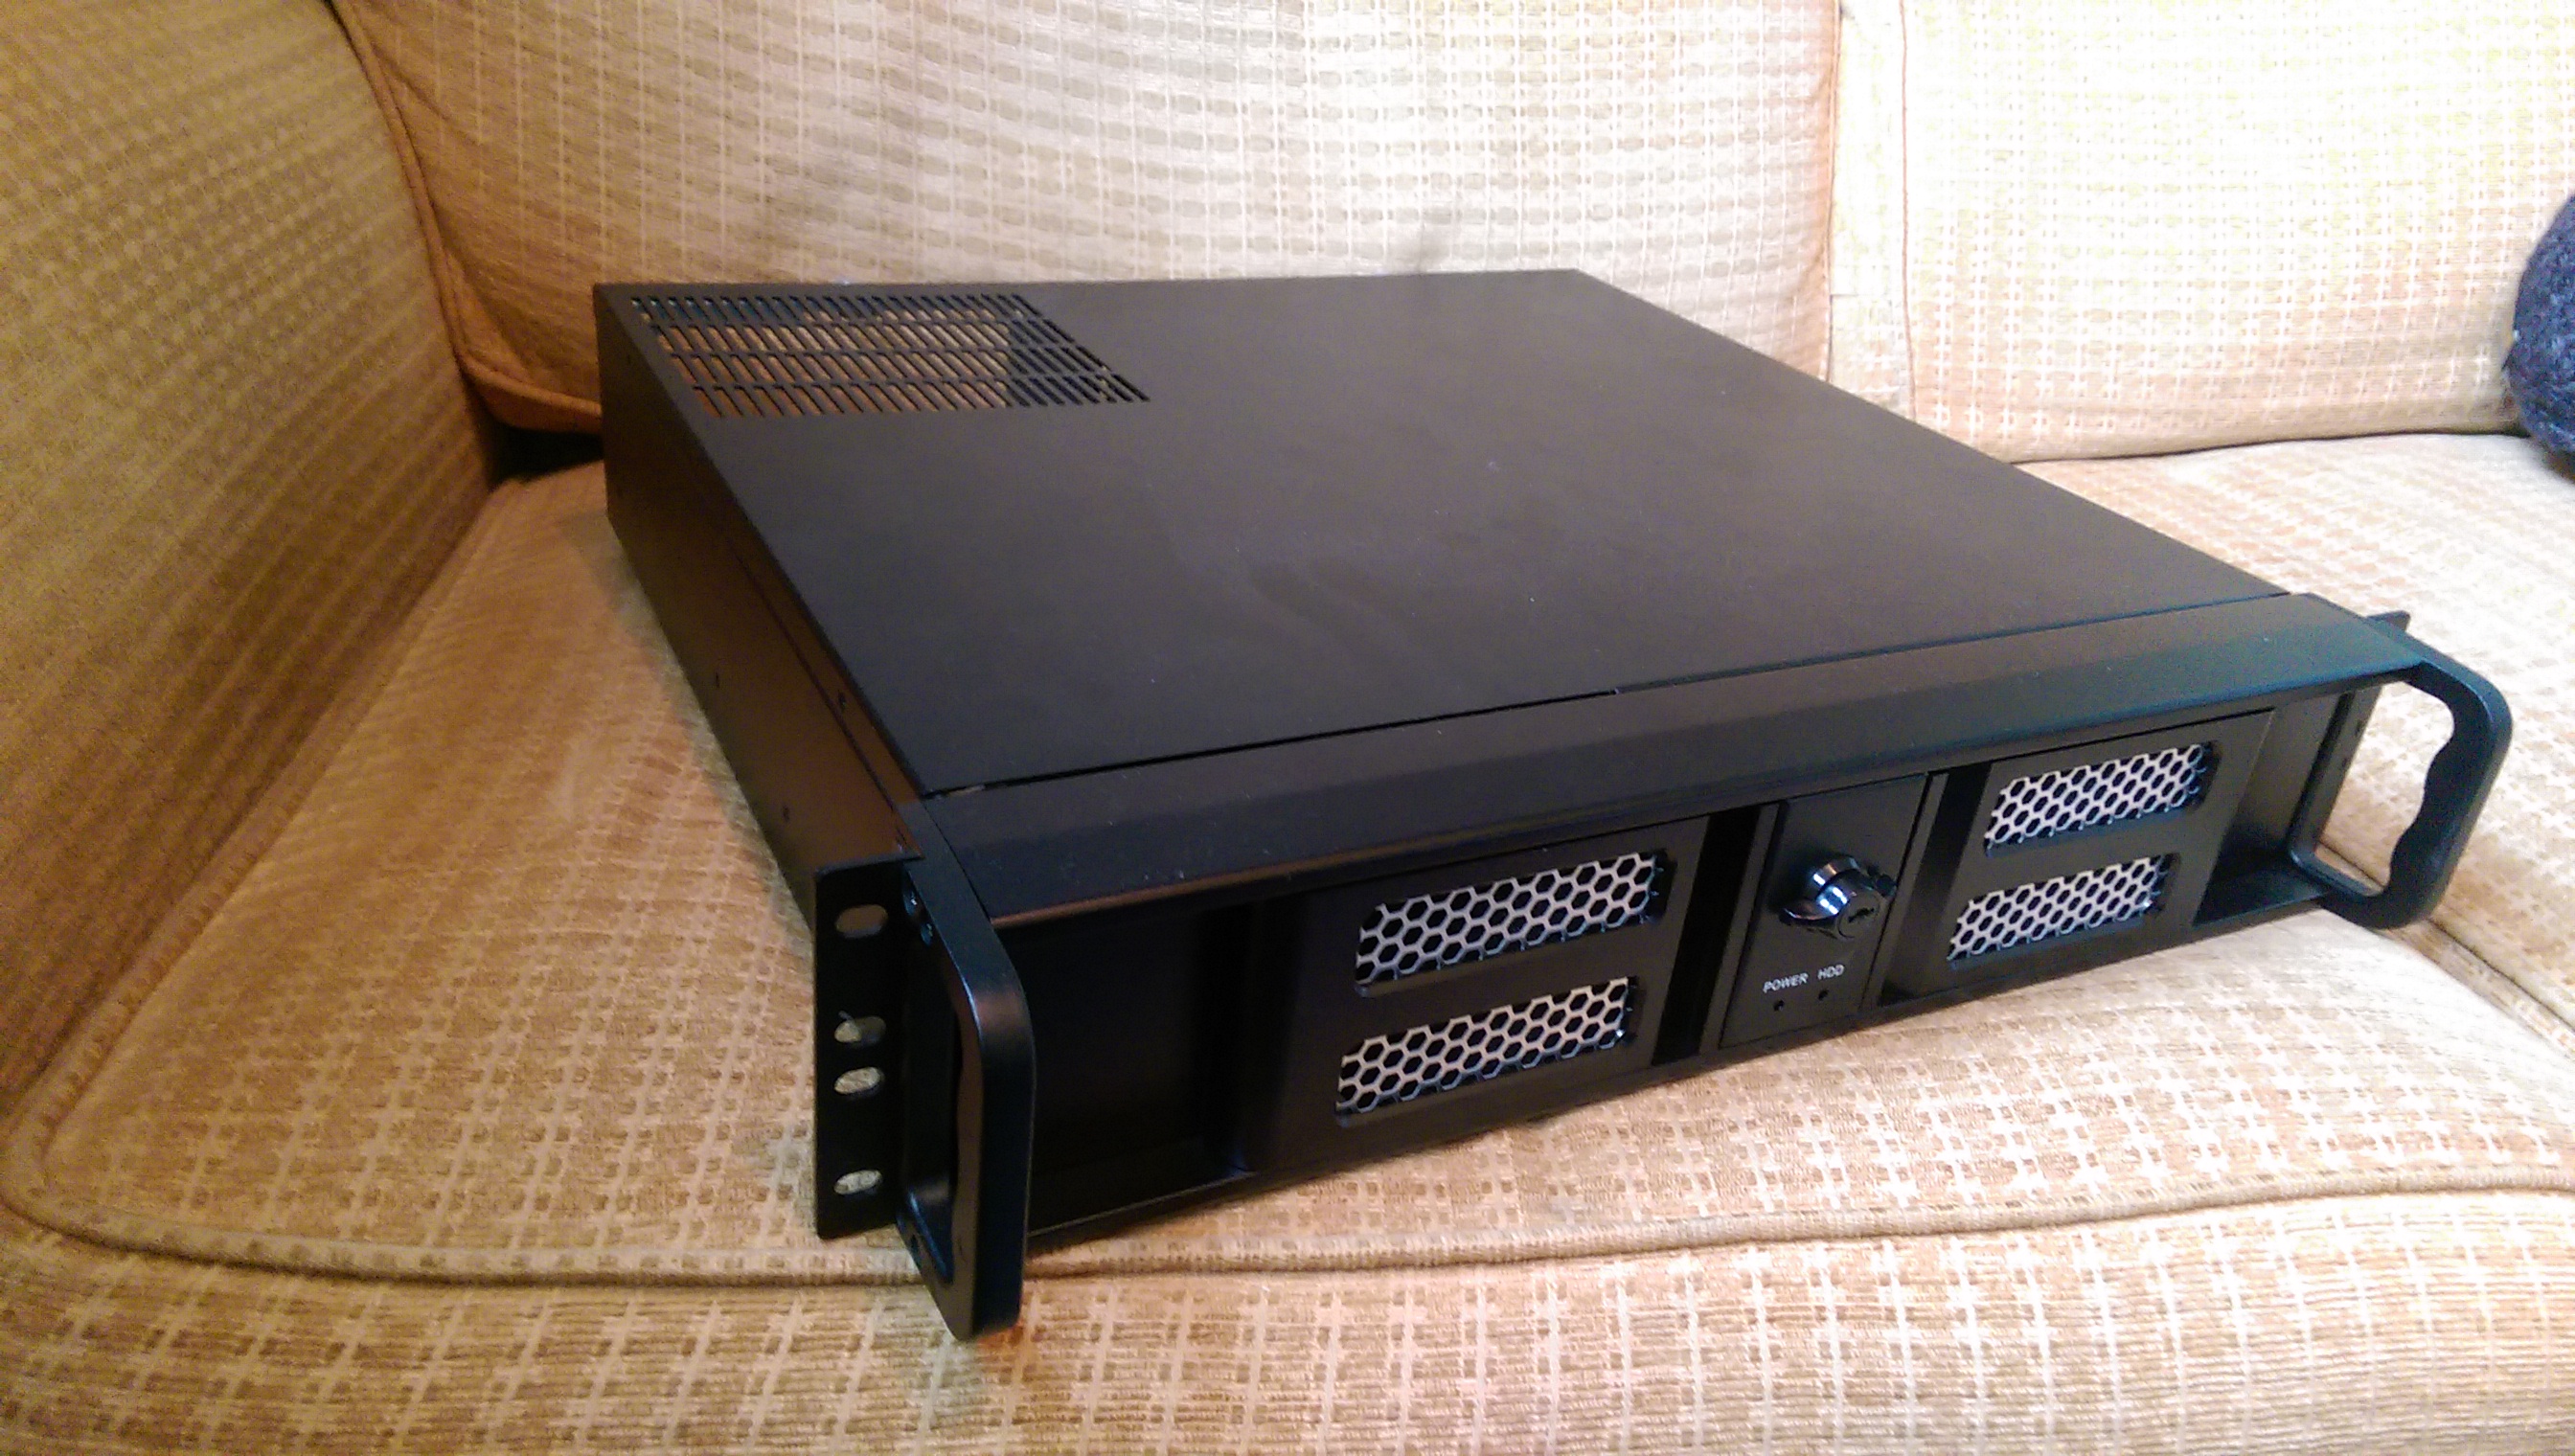
I really liked the double opening doors at the front to access the power and reset switch and also the ability to lock the case, extra security is always good in a van!
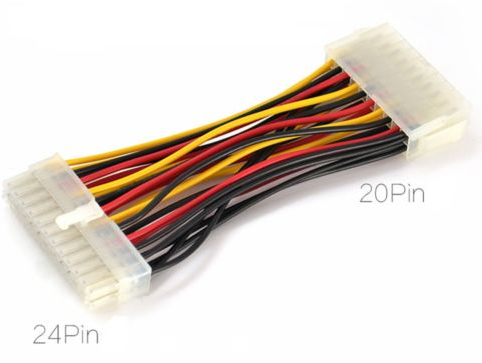
The PSU was quite awkward to connect to the motherboard. On a normal supply, you would have a 24 pin combined with an 8 pin ATX connector supplying power to the motherboard. This is pretty standard on most desktop computers and the connection can usually be made straight from the PSU. The 12 Volt supply, however, featured a 20 pin ATX connector and a separate 4 pin connector. Neither of which were included with the supply.
I did a bit of research and discovered I could buy a cable to convert from 20 pin to 24 on the motherboard. I bought one like this from eBay.
I now needed a male to male 4 pin ATX connector. I looked everywhere and couldn’t find one, I asked people at work (I used to work in an IT department, so lots of useful techhie people around) and people online and no one had heard of this connector. The nearest I could find was a male to female cable. In the end I gave up looking and decided to make my own.
I bought two 4 pin male to female connectors from eBay, snipped the female ends off and joined the male ends together.

I was a bit cautious about doing this given the sensitive nature of the components and double and triple checked that I had joined the correct wires together.
Pro Tip: They now sell these cables on mini-box.com, here: http://www.mini-box.com/P4-12V-to-P4-12V-Cable-for-M2-ATX this is much easier than making your own!
I connected the components together, placing the power supply at the rear of the case in the space where an ordinary PSU would sit. I had to drill and tap extra holes that would match with the holes on the power supply.

I used an old piece of rubber-backed carpet to isolate the supply from the metal of the case. This probably isn’t ideal, but it works and I’ve never had a problem with it.

After I’d connected the supply to the motherboard I connected the 12 Volt power to the jumper pins on the left of the board. There are several power configurations but I didn’t need anything special so I chose the basic ATX function so the supply would function as a standard PSU.
Computer Screens

As I mentioned above, I really wanted to have as many things as possible running natively from 12 Volts. I searched for quite a while trying to find a 12 Volt computer monitor but couldn’t find anything decent so I decided to adapt a conventional 240 Volt monitor.
In the end I bought two ASUS VC239H

This monitor was ideal because it was powered by 19 Volts DC and used an external power supply brick that connected to the monitor using a standard tubular DC power adaptor, pictured below (rather than a direct 240 Volt connection straight into the back).

I then bought an adjustable car laptop power adaptor from eBay for about £9 which can convert a 12 Volt supply to a range of voltages. They come with a selection of plug adaptors so will fit a large range of DC equipment.
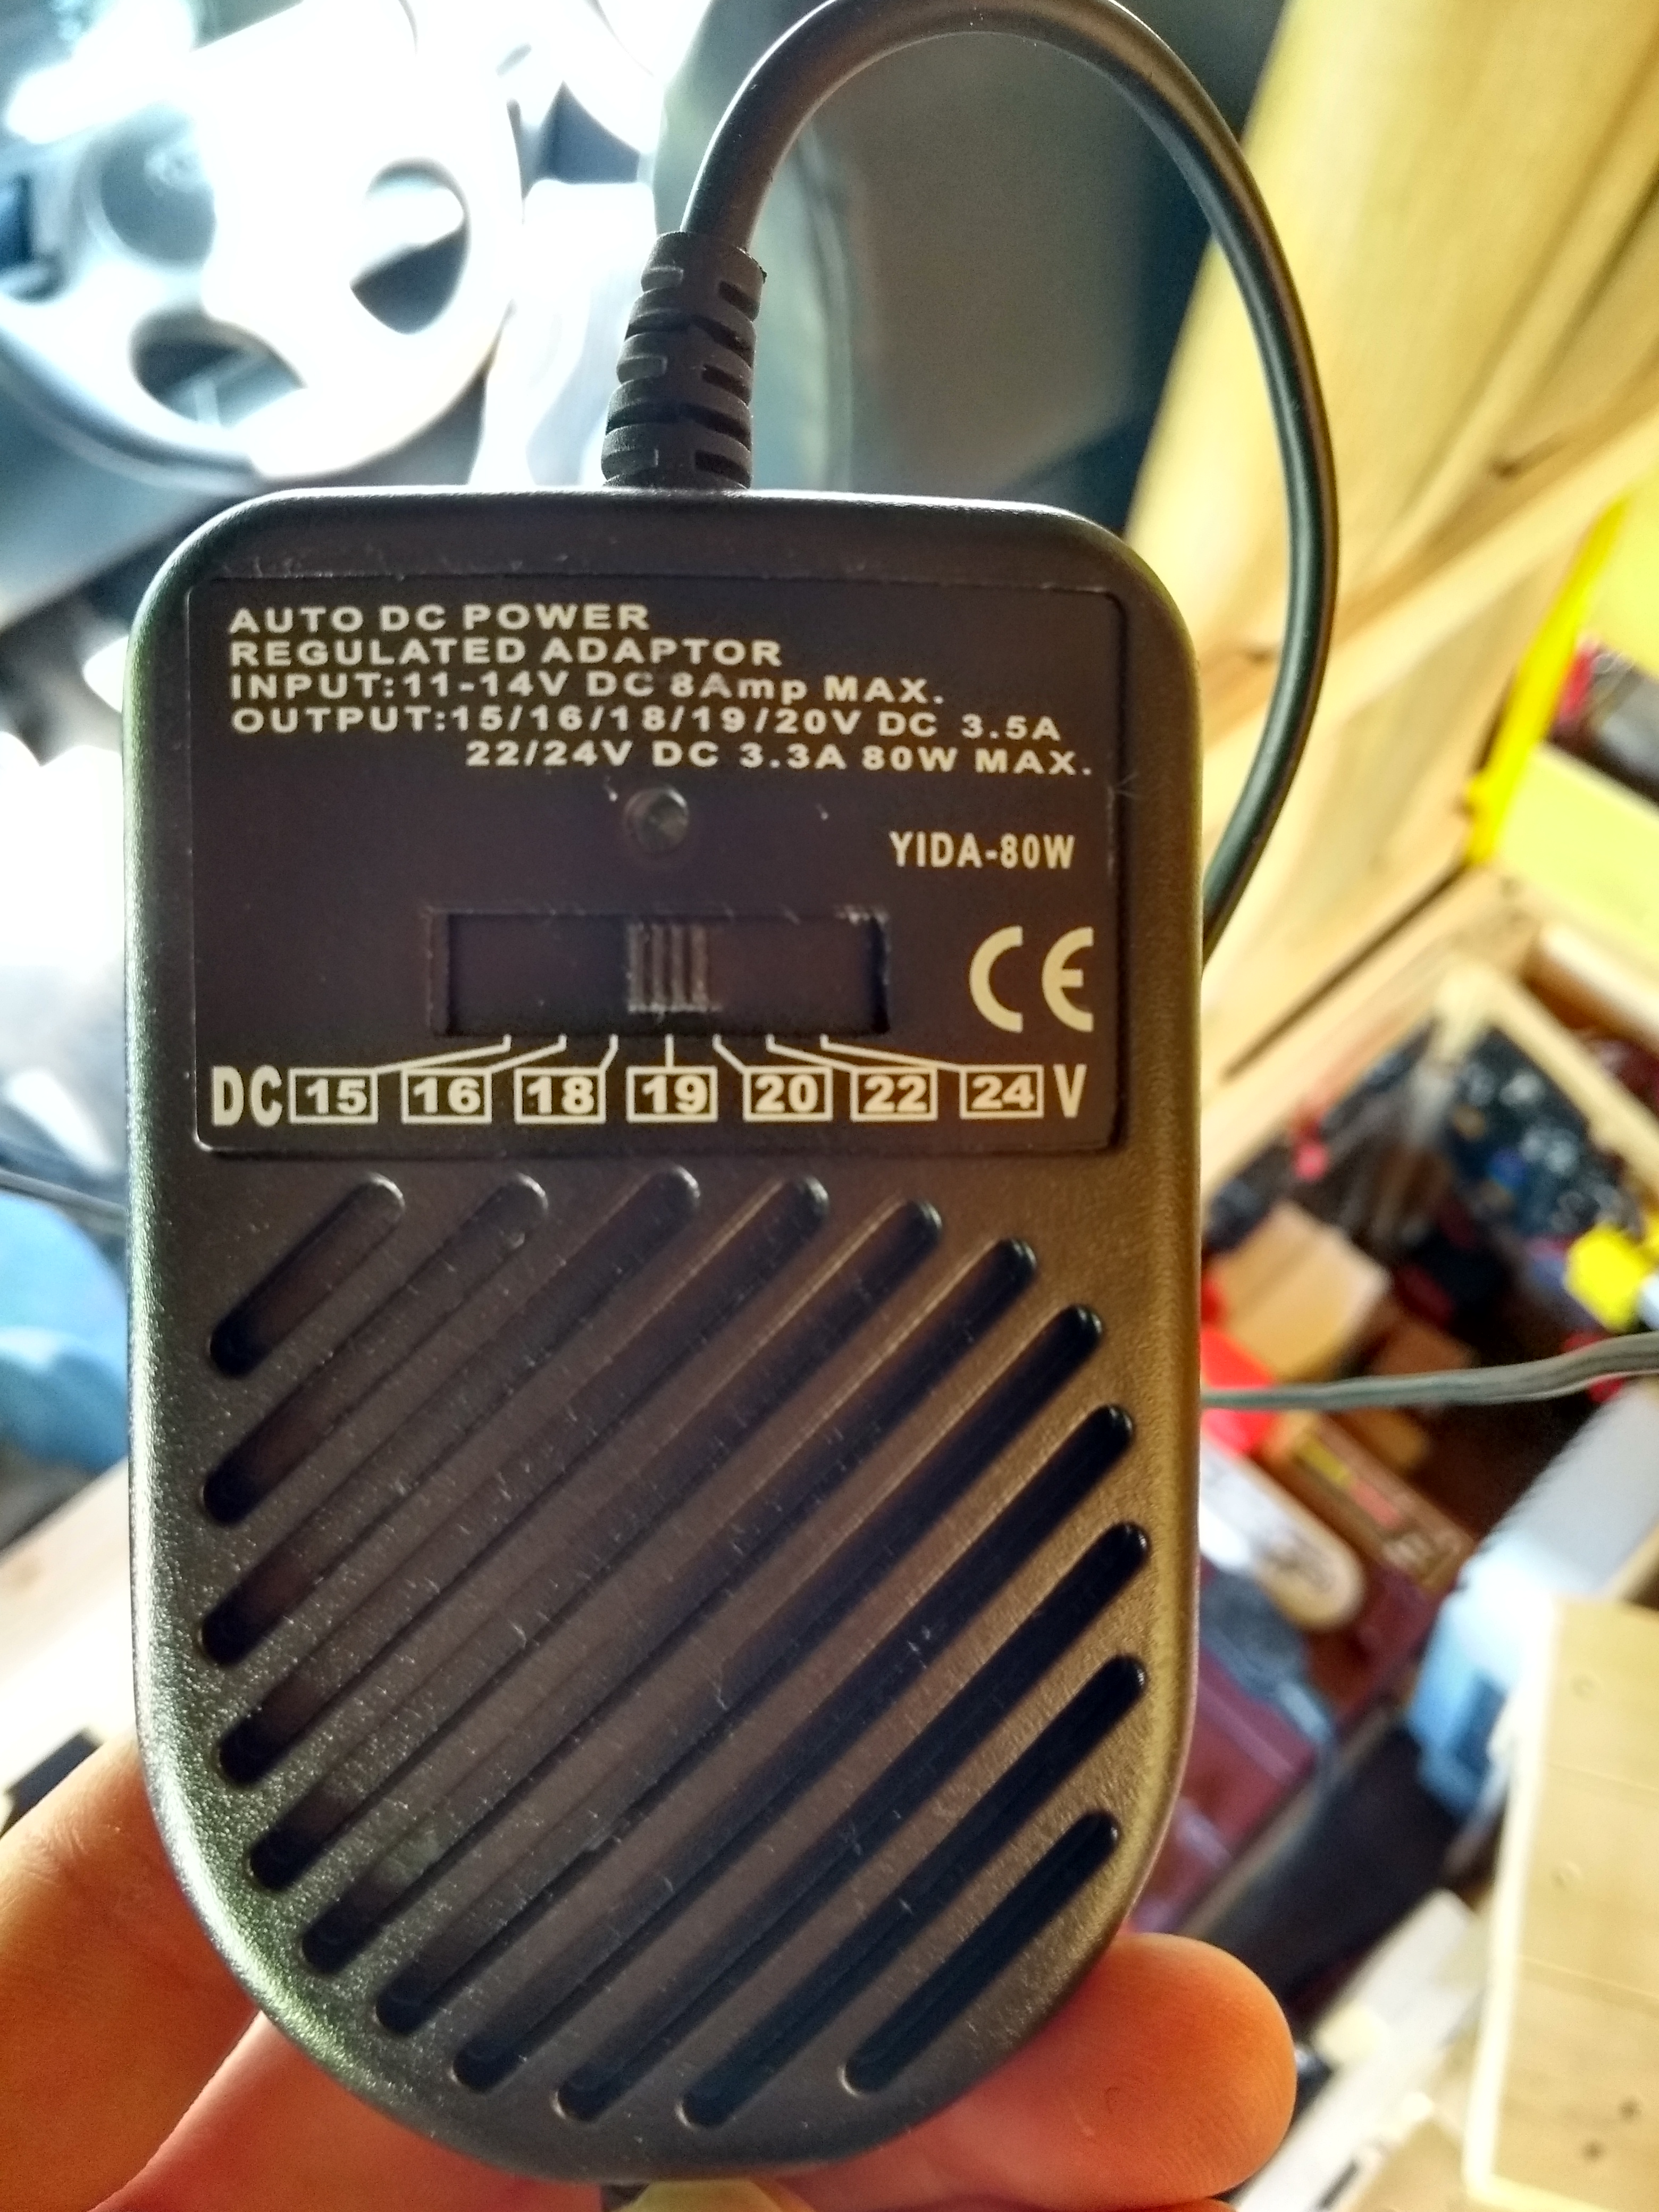
I removed the cigarette lighter attachment from the end of the supply, exposing the positive and negative wires.

I then connected the adaptor to the Screen and the positive wire to a toggle switch and then both wires back to my fuseboard.

The switch meant that I could easily turn the monitors on and off without faffing around with the annoying power buttons on the front of the screens. I really like these oldskool clunky switches, not enough things these days have a tactile switch. I also connected a light above the studio space so I could work when it was dark.
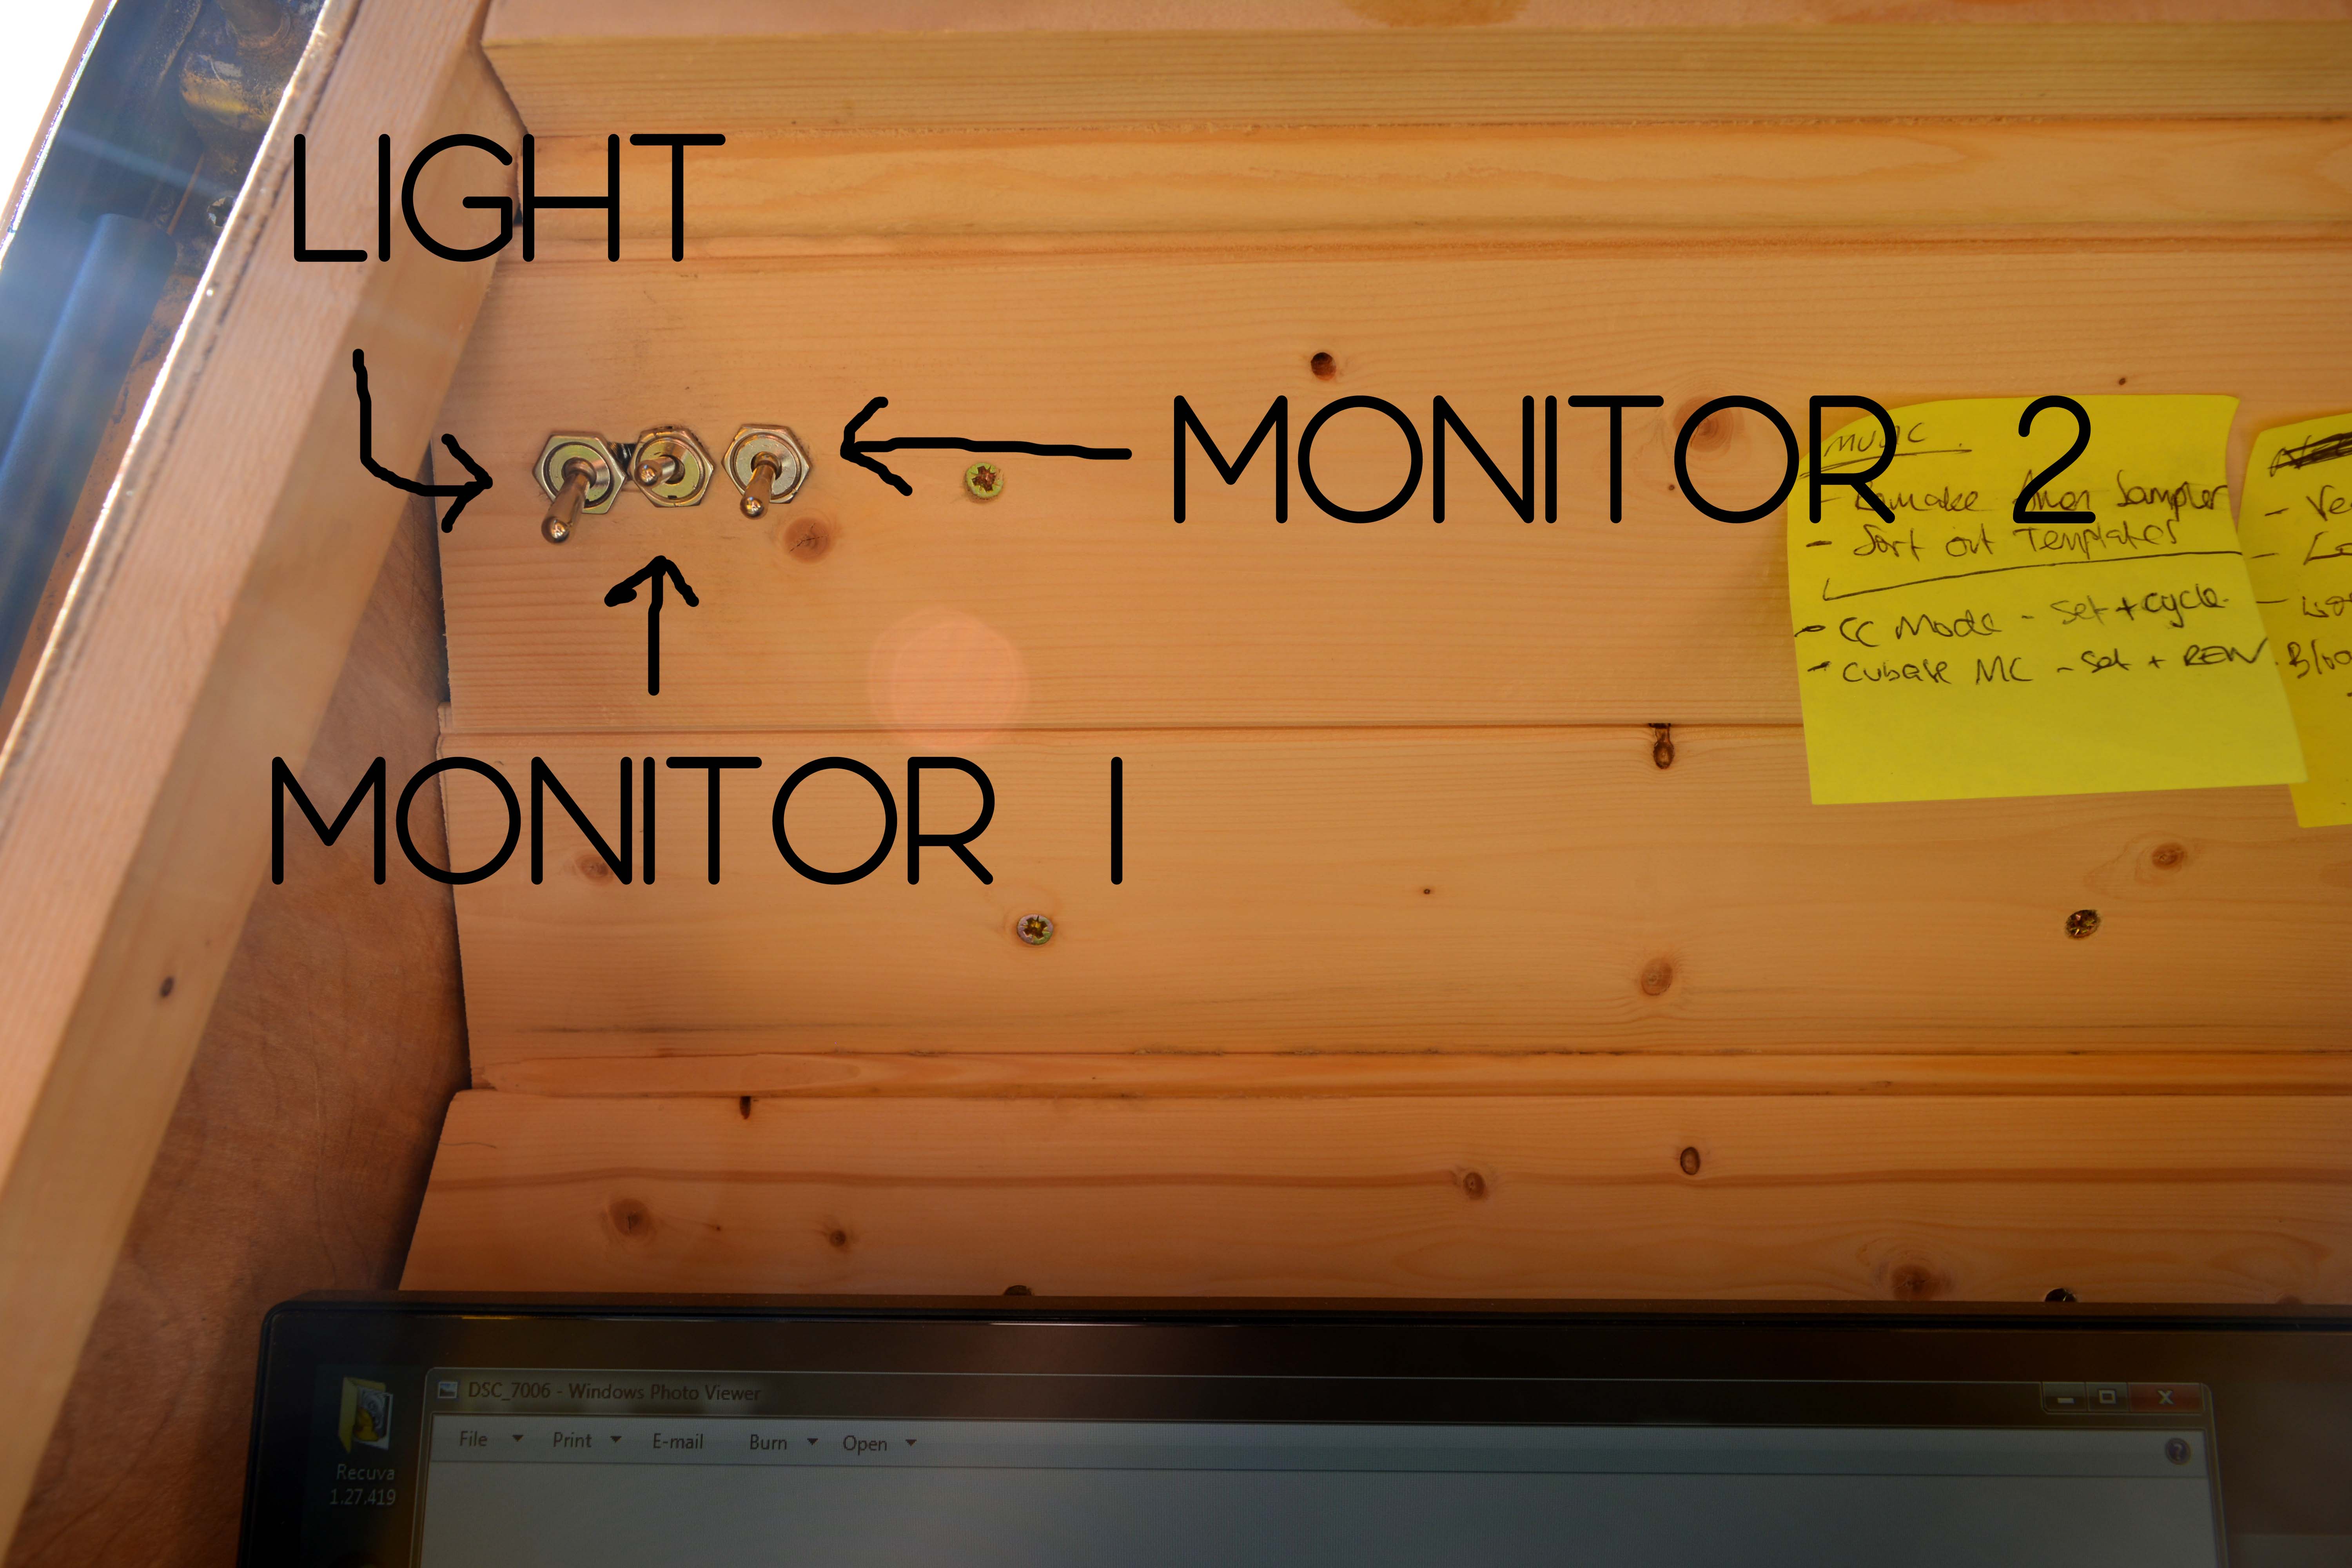
I was a bit dubious about these cheap DC laptop power supplies from eBay but they’ve been fine and after a year of use I’ve never had any issues. The clunky switches are awesome and makes it really easy to turn the screens on and off and has the added bonus of feeling like I’m in a fighter jet every time I start my PC.
Power Consumption
- Screens: 22 Watts (1.8 Amps)
- Computer 16 – 35 Watts (1.3 – 2.9 Amps)
The entire system uses about 60 Watts (5 Amps) when both screens are on and rises slightly to a max of about 80 Watts (6.6 Amps) when I’m doing something more intensive like video editing. This is about the same amount of power as a laptop would take when charging and I have the benefit of two large screens! I don’t always have both screens on though, and with just one screen doing something like writing my blog it only takes about 40 Watts (3.3 Amps) of power.
Cost
These prices are from when I built the computer over a year ago so they are probably a bit different now and you might struggle to get the same components if you wanted to build something similar. It should be a reasonable guide though.
| Component | Cost |
| Screen – ASUS VC239H | £123 (x2) |
| PC Case – 2u Rackmount Micro-ATX | £82 |
| Power supply – Mini-Box M2-ATX 160W | £61 |
| Motherboard – Asus B150M-A/M.2 Intel B150 | £47 |
| Processor – Intel Core i3-6100 3.70GHz (Skylake) Socket LGA1151 | £95 |
| RAM – Team Group Elite 16GB (2x8GB) DDR4 | £72 |
| CPU Cooler – Arctic Freezer 11 Low Profile | £11 |
| Case Fan – Scythe Mini Kaze 60mm Quiet Fan | £7 |
| Main Operating System Storage – Samsung 250GB 750 EVO SSD 2.5″ | £57 |
| Mass storage – 1TB Western Digital Blue mecanical drive | £44 |
| Total | £722 |
For a fairly low-spec setup the computer is surprisingly capable. I’ve always built my own computers and in the past have often got caught up in buying the newest and most powerful components. Initially I was concerned that this computer would struggle with some of the more intensive tasks like video editing or dealing with a particularly big studio session but It’s handled everything I’ve thrown at it so far. It takes slightly longer to loads some things and isn’t as lightning fast as my main studio computer but it was a fraction of the cost and is powered by batteries so I think it’s a fair trade off!
I’ve been using this setup for over a year now and I haven’t had any issues with any of the components that I made or hacked together. I’m really impressed with the power supply. After I’d sorted the issues with the cables it just worked straight away without any additional configuration or extra software running on my PC. The shock resistant rack seems to have protected the components from day-to-day bumps and knocks. I really didn’t think the mechanical Hard Disk Drive would survive the road but I’ve had no problems so far, pretty amazing really considering some of the rough roads that I’ve driven down!


