
Battling Rust – How I Treat The Rust On My LDV Convoy Camper
I love my van. Sure, it’s a bit noisy and handles like a boat but I think the boxy design gives it character. The price I’m paying for that character, however, is that my van is slowly disintegrating!
As far as I can tell, the design of the LDV van wasn’t changed much in the sixteen years that the company was trading. It’s very basic. The simple design means there’s lots of little alcoves where water can collect, unnoticed, and rust can grow until one day you see daylight where there was once metal.
Dealing with rust always confused me a bit. There are 101 different products to use and everyone you ask seems to have a varying opinion about how to approach the task. In this post I’m writing the guide that I wish I had when I first bought my van. I’ll go through the entire process and share which things have worked for me and some nuggets of wisdom that I’ve learnt in the years that I’ve been battling the rust on my LDV Convoy camper van.
Know The Problem Areas
Depending on the design of your van, rust will start to appear in different places. It’s good to know in advance if there are any places to watch out for as you can treat them before they get really bad. Here are some areas on the LDV Convoy to watch out for.
Bottom of the Front Window Seal
This is quite a big one and one that seems to happen to all LDV Convoys at some point. Water sits in the tray-type section below the windscreen at the back of the bonnet. You’ll need to take the plastic cover off to get a proper look. I removed all the rubber seals too and found quite a bit of rust.

If this section rusts through then it can eventually lead to holes that let water into the cab. Not only does this get a bit squelchy underfoot but the ECU (Engine Control Unit, very important!) is located underneath the area effected. Getting this wet could be calamitous to the health of your van. It’s best to keep this dry.

In addition to the ECU problem water ingress from here can cause pooling underneath the matting on the cab floor which can lead to the seat mountings becoming rusted and weak. Apart from not being very safe, this is an MOT failure in England.

Wheel Arches
I think this is pretty much universal for all old vans. Wheel arches get hammered pretty hard all year round. Stones and pebbles are constantly thrown at the inside surfaces which are then doused with water, salt and other substances found on roads.

Mine started bubbling at the same place on either side. When I did a bit of investigatory prodding with a screwdriver I found that, below the paintwork, large areas of bodywork were completely rotten and started to fall away.
Sills and Sliding Door
Again, I think this is a problem area on most older vans. The sills are the long stretches of metal between the front and back wheel arches.

The off-side (drivers side) sill on my van was quite badly rusted. The other side at the bottom of the sliding door was also pretty bad.


Bumpers
The bumpers on my van are really simple. There are shaped pieces of metal that the plastic outer pieces screw into. On my van these have rusted quite badly causing the fixings to break or come loose. If too many of these break the bumpers hang off the van which looks really tatty.
The bottom section underneath the plastic bumpers on the rear has rusted really badly on my van. This is pretty much all the way around from wheel to wheel.


I repaired a small section of the bumper with fibreglass which should last a while but when they finally rust away I’ll have to get them re-fabricated and welded. It’s always better to know these things so you can plan ahead!
Shock Mountings
This is the area on the chassis where the shock absorbers and suspension coils are bolted. I noticed a tiny hole which opened up to a worryingly large area when I investigated further.

Needless to say, any rust on the chassis can cause big problems if not treated quickly and if the area is structural can cause the vehicle to fail the MOT. I keep a particular eye out for rust on chassis members. If I see something that looks worrying I’ll grind it back to good metal and take it to get welded before it becomes a bigger problem.
Inside Chassis Members
The LDV Convoy is based on a simple, oldskool chassis consisting of many box-sections which provide overall strength and stability. The box design can be problematic as water can sit inside the sections and rot them from the inside out. These sections are especially tricky to inspect as you can’t actually see inside the to check the condition.

Steps and Footwells
It’s important that you take off the plastic fascias and check for rust beneath the steps. Although there are drainage holes here, I still found that water has been sitting towards the back and there were a few holes.


While I had these off I also pulled up the rubber mat in the cab and checked the condition of the floor.

Treatment
The basic premise here is as follows:
- Explore area with a screwdriver or other poking device to determine how large the area is
- Remove loose rust and paint bubbles with wire brush or wire drill attachment
- If possible use angle grinder and ‘flap disk’ to grind back to good metal around the area
- Wipe area down with white spirit, Isopropyl alcohol or similar to remove small particles of rust and dirt
- Apply rust killer/converter
- Paint
- Fill holes
- Paint
In this section I’ll go into more detail about this process.
Ruthless Poking
You’ve got to be really brutal with rust. It will always come back at some point but if you miss an area or leave a section untreated then it will come back much more quickly and your hard work removing it will have been for nothing.
Use something like a old screwdriver to tap the metalwork where you suspect rust to be hiding. You’ll soon know if there is rust underneath as it will crumble and you’ll be left with a hole. Keep tapping untill you get to good metal, then you can get to work treating and removing it.
Removal
Once you’ve identified an area that you need to treat start by using a wire brush or an angle grinder with a ‘flap disk’ to take the rust back to good metal. You’ll know it’s good metal because it will be nice and smooth and shiny.

Again, be really ruthless with this. You’ll see your van disintegrating in front of you, which is heartbreaking, but it’s better to be safe than sorry and your future-self (and your van) with thank you.
Give the area a quick clean with some Isopropyl alcohol or similar to remove small particles of rust and dirt.

Use Rust Killer or Converter
Once you’ve ground back the area to good metal it’s time to kill or convert any remaining rust. Below is the holy trinity in your battle against the red scourge. These are the products I’ve had the best results with and with this combination have managed to keep my van on the road and rust-free a little bit longer.

Aquasteel
This converts the rust to an inert form and then creates a film of latex over the top so any particles don’t escape. I bought a 2.5kg bottle for about £25 from eBay and this lasted me two years of rust killing. Aquasteel is really quick to apply but you’ll have to leave it for 24 hours before you can paint it.

Jenolite
The ‘Rust Remover’ formula uses an acid to kill the rust rendering it inert. It’s a bit more effort to apply as you have to keep applying it until all the rust is removed from the area and the metal is a dark grey colour. The advantage is that Jenolite can be painted about half an hour after application. This is really handy if you’re on the road or a bit short of time.

I use a combination of both, depending on which area I need to treat.
- If it’s visible bodywork the I’ll use Jenolite as I find it gives a better finish for painting.
- In hard to reach or dirty areas that are out of sight I find Aquasteel a bit easier to apply. I like Aquasteel on areas that aren’t visible. Under sills, underneath bumpers and inside the engine compartment for example. In these places you can just paint it on really quickly and thickly without worrying too much about the finish.
Painting
Once you’ve treated or killed the rust you’ll need to give it a few coats of paint to stop further rust from happening and protect it against the elements.
On the outside bodywork I’ve found it easiest to use spray cans but a can of paint and a roller could probably achieve a decent finish too. Car spray paint works well and also I’ve had great results using sprays from Toolstation (https://bit.ly/2TolIle). They are a bit cheaper than car paints and dry to give a really tough finish. I like to use these on areas that I know will be open to the elements or take a hammering.

Either way you’ll need to give the repaired metal a coat of primer before the top coats. If the surface is still slightly uneven you can use a filler primer. You’ll need to sand this afterwards again with a fine sandpaper and wipe the surface with some isopropanol alcohol or similar to get rid of any dust.
On the underside or areas that won’t be seen such as underneath the rubber floor in the cab I’ve had best results applying two coats of Red Oxide Primer and then a coat of Hammerite or other metal paint. This has worked really well for me so far.

The Red Oxide paint is less viscous than the Hammerite and gets into all the cracks and crevices a bit easier, I find it sticks a bit better to already painted metal too. Hammerite gives a nicer finish than the Red Oxide Primer, the Red colour looks awful on my van!

On sections that seem particularly vulnerable to the elements (wheel arches, chassis members, etc) it might be worth applying an extra layer of an underseal type coating such as Waxoyl Underseal. This will give added protection against road wear and water.

Repairing holes
No doubt that all of that grinding and poking has probably left a few holes in your van. If these holes are superficial and in a non load-bearing area then you can safely repair any damage with fibreglass and finished with a car body filler. This is a great option if, like me, you can’t weld.
You can buy fibreglass kits from any auto shop or online. If you’ve only got a small area to fill then something like this will do (https://amzn.to/2tPbonX).

If you’ve got a larger section to fill then I found an excellent kit on Amazon (https://amzn.to/2GORKRa)

This kit contains enough material to build a small boat. If this is too small then you should probably look at getting the area welded…. or buying another van.
Regardless of which kit you get, it will contain the same basic components. A sheet of fibre matting and a two-part resin substance that you’ll need to mix together to achive a gloopy, foul-smelling mixture.
It’s worth noting that at the time of writing the large kit from Amazon (link above) contains a 2% catalyst so you’ll need to use a mixture of 2ml per 100ml of resin. This should give you a 15 minute working time. The Isopon kit is a bit more vague. I normally add a 20mm snake of catalyst per 50ml of resin.
The basic principle is that you cut the fibre matting to the correct size for your hole and then paint the resin over to top. Sounds easy, but depending on the amount of fixing agent you added to the resin-base, the resin will start to congeal and set within minutes. You’ve got to work quickly to avoid becoming a sticky mess. Oh, and wear gloves and some old clothes, it will go everywhere!

Depending on the ambient temperature the fibreglass should set hard within an hour. If in doubt, leave it for 24 hours. I did this in Winter and it took aaaages. The resin won’t stick so well if the surface is wet, you’ll know this is the case as the resin will turn milky and won’t properly dry. I used a heat gun to dry any wet areas which worked well.
Once the layer of fibreglass is set, you can sand it down to achieve a smooth surface or add another layer for more strength.
If the repair is on the outside bodywork then it’s a good idea to apply a layer of car bodywork filler to acheive a smoother finish than the fibreglass alone. I used Isopon P38 which did a great job.

Once the filler has hardnened you can use a fine sand paper to get a really smooth finish. Start with something like 180 grit working up to around 600, you can go further if you want it really smooth!
I used this technique on the front wheel arches, bumper and steps. It took a while but was much cheaper than taking it to be welded. Once the repair is complete you’ll need to paint the area again.


Future Rust Prevention
Now that you’ve put all this work in making your van rust-free (hopefully!) it’s worth going one step further and applying some kind of rust-proofing to slow down future rot.
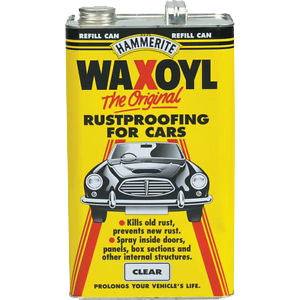
Waxoyl
I’ve used a product called Waxoyl on my van. It’s pretty much exactly what it sounds like, a waxy, oily mixture that clings onto metalwork, killing any rust that it touches whilst staying slightly viscous in order to stop future rust from forming.
If you don’t have access to a lifting ramp then you’ll have to chock your van up and crawl underneath. This is a really unpleasant job! Waxoyl stinks and will stick to everything it comes into contact with so I’d recommend you’re wearing old clothes, and a hat, gloves and a facemask. It’s been about a month since I’ve done this and just writing this has brought memories of the smell back.
I used an air compressor and a spray attachment to apply the Waxoyl which is much easier than trying to paint it on or hand spray it.
I bought this attachment from Amazon (https://amzn.to/2EyyFjT).

And this ‘Schutz’ style can which screws into the spray gun (https://amzn.to/2Ey1oFz).

This is by far the easiest way to apply Waxoyl. If you don’t have a compressor then I’d seriously consider borrowing or renting one. Painting it on sucks!
Ideally you want to spray this on a warm dry day or inside if you’re lucky enough to have space for your van. Before you spray anything leave the can to warm up for about five minutes in a bucket of boiling water. This will allow the mixture to become less gloopy and more liquid which will give a better result when spraying.

I was pretty liberal with my application so the litre can didn’t last very long. I bought a big 5 litre refill can and refilled the litre can as necessary. This gets reeeeally messy so I’d advise doing this on a surface that you don’t mind getting waxy and oily. I used a few cardboard boxes.
The idea is to basically cover any section that could potentially rust. As I mentioned before, you can apply the Waxoyl pretty thickly. I wasn’t too precious with it and blasted it everywhere I could. Anything to stop that rust!
Here’s a quick checklist of good places to start:
- Inside the bonnet and above the wheel arches if possible
- Any engine mountings
- Underneath rubber and plastic of footwells and steps
- Along the sliding section of the sliding door
- Underneath wheel arches
- Inside and underneath sill sections
- Inside all chassis box sections
- Above fuel tank
- Suspension and shock mountings
- Underneath plastic of bumpers
- Inside fuel filling cap
- Inside doors and jamb sections
This will obviously be differend depending on your van but should be a good start. You basically want to cover any section that might come into contact with water. Don’t be afraid to coat moving parts like springs or mountings either, its basically oily wax so should add some lubrication.
Once you’ve done the hard to reach areas give the whole of the underside a good covering. Just spray it on everything. Your van and future-self will thank you.
One mistake I made when I first did this was to be too conservative. I was worried about getting it on any moving parts or the engine. Because of this I’ve had quite a bit of rust develop in areas that could have been prevented if I’d have been a bit more judicious. Again, just cover every inch of that underside.
Hopefully that’s given you a good idea about how to approach treating the rust on your van. It’s annoying to do but if you’re thorough and keep on top of it then you can add years to the life of your van. I’d say I’ve spent on average three weeks a year sorting out the rust on my LDV. That’s time well spent I think!


fafaslot
Hello there! I could have sworn I’ve been to this blog before but after
browsing through some of the post I realized it’s new to
me. Anyways, I’m definitely happy I found it and I’ll be book-marking and checking back frequently!